Specification-Driven Development in the AI Era
Complete guide to systematic AI development with GitHub Spec Kit. Move beyond "Vibe Coding" to build scalable, maintainable production code that truly works.
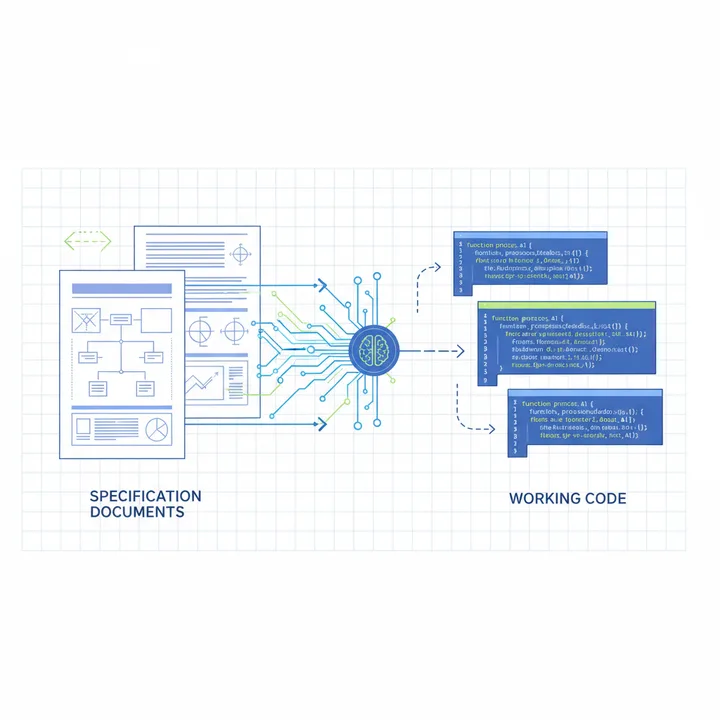
A New Paradigm for AI Coding
In early 2025, Andrej Karpathy coined the term “Vibe Coding” - throw prompts at AI, copy the generated code, and hope it works. Great for prototypes, but it falls apart fast on larger projects.
Enter Specification-Driven Development (SDD). Write clear specifications in Markdown, and AI coding agents “compile” them into executable code. This approach is now being productized in spec-driven AI IDEs like Amazon Kiro. This isn’t just a methodology shift - it’s a fundamental transformation in how we build software with AI.
The Limits of Vibe Coding
Let’s see the problems with Vibe Coding in a real scenario:
// Vibe Coding approach
// Prompt: "Create a user authentication system"

// AI generated code (1st attempt)
function login(username: string, password: string) {
  // Some logic...
  return true; // Always succeeds?
}

// Problem found, re-prompt: "Add password hashing"
// AI regenerates code... loses some previous logic

// Prompt again: "Add token expiration handling"
// Regenerates again... getting messier and inconsistentProblems:
- AI loses full context with each prompt
- Previous decisions get ignored or overwritten
- Code quality becomes inconsistent and unpredictable
- Doesn’t scale (1-2 files are fine, but 50 files?)
What is Specification-Driven Development?
Specification-Driven Development is a methodology where you clearly define “What” to build, then let AI implement “How”.
Core Principles
-
Specification as Single Source of Truth
- Specifications, not code, define the project
- All changes start with specification updates
-
Structured Workflow
- Specify → Plan → Task → Implement
- Each phase clearly separated and traceable (it also connects to Claude Code’s 5 agentic workflow patterns)
-
AI as Tool, Developer as Designer
- Developer decides “what” (architecture, business logic)
- AI executes “how” (code generation, testing, optimization)
Comparison with Traditional Development
| Aspect | Traditional Development | Vibe Coding | Specification-Driven Development |
|---|---|---|---|
| Starting Point | Requirements document | Ad-hoc prompts | Structured specification |
| AI Role | None or assistant tool | Full code generation | Spec-based code generation |
| Consistency | Depends on developer experience | Low (varies per prompt) | High (guaranteed by spec) |
| Scalability | Possible but slow | Impossible (complexity↑ quality↓) | Excellent (manage spec only) |
| Maintenance | Code modification needed | Risk of full regeneration | Update spec then regenerate |
| Collaboration | Code review | Difficult | Spec review (more clear) |
Real Example: Building Auth System with Spec-Driven Approach
Let’s walk through a real example using GitHub Spec Kit step by step.
Step 1: Write Specification
<!-- spec/auth.md -->
# User Authentication System Specification

## Overview
Secure authentication system with JWT tokens, password hashing, and session management.

## Functional Requirements

### FR-1: User Registration
- **Input**: username (string, 3-20 chars), email (valid format), password (min 8 chars)
- **Process**:
  - Validate inputs
  - Hash password with bcrypt (cost factor: 12)
  - Store user in database
  - Generate verification email
- **Output**: User object (without password), HTTP 201
- **Error Cases**:
  - Duplicate username/email → HTTP 409
  - Invalid input → HTTP 400

### FR-2: User Login
- **Input**: username/email, password
- **Process**:
  - Find user in database
  - Compare hashed password
  - Generate JWT token (expires: 24h)
  - Create session record
- **Output**: { token, refreshToken, expiresAt }
- **Error Cases**:
  - Invalid credentials → HTTP 401
  - Account not verified → HTTP 403

### FR-3: Token Refresh
- **Input**: refreshToken
- **Process**:
  - Validate refresh token
  - Generate new access token
  - Update session
- **Output**: New token pair
- **Error Cases**:
  - Invalid/expired token → HTTP 401

## Non-Functional Requirements

### NFR-1: Security
- Passwords must be hashed with bcrypt (never stored plain)
- JWTs signed with RS256 algorithm
- Refresh tokens rotated on each use
- Rate limiting: 5 attempts per 15 minutes per IP

### NFR-2: Performance
- Registration: < 500ms (95th percentile)
- Login: < 200ms (95th percentile)
- Token refresh: < 50ms (95th percentile)

### NFR-3: Database Schema
```sql
CREATE TABLE users (
  id UUID PRIMARY KEY DEFAULT gen_random_uuid(),
  username VARCHAR(20) UNIQUE NOT NULL,
  email VARCHAR(255) UNIQUE NOT NULL,
  password_hash VARCHAR(255) NOT NULL,
  email_verified BOOLEAN DEFAULT FALSE,
  created_at TIMESTAMP DEFAULT NOW(),
  updated_at TIMESTAMP DEFAULT NOW()
);

CREATE TABLE sessions (
  id UUID PRIMARY KEY DEFAULT gen_random_uuid(),
  user_id UUID REFERENCES users(id),
  refresh_token VARCHAR(255) UNIQUE NOT NULL,
  expires_at TIMESTAMP NOT NULL,
  created_at TIMESTAMP DEFAULT NOW()
);
```

## Implementation Guidelines
- Use TypeScript with strict mode
- Follow REST API conventions
- Write unit tests for all endpoints (coverage > 90%)
- Use dependency injection for testability
- Log all authentication attempts (success/failure)
Step 2: Generate Plan
Ask the AI agent to generate a technical plan based on the specification:
# Using GitHub Spec Kit
npx github-spec-kit plan spec/auth.md
AI-generated plan:
<!-- plan/auth-plan.md -->
# Authentication System - Technical Plan

## Architecture

### Components
1. **AuthController**: REST endpoints handler
2. **AuthService**: Business logic layer
3. **UserRepository**: Database access layer
4. **PasswordHasher**: bcrypt wrapper utility
5. **JWTManager**: Token generation/validation
6. **RateLimiter**: Request throttling middleware

### Dependencies
- express: ^4.18.0
- bcryptjs: ^2.4.3
- jsonwebtoken: ^9.0.0
- pg: ^8.11.0 (PostgreSQL client)
- express-rate-limit: ^7.0.0
- joi: ^17.10.0 (validation)

### File Structure
```
src/
├── controllers/
│   └── auth.controller.ts
├── services/
│   └── auth.service.ts
├── repositories/
│   └── user.repository.ts
├── utils/
│   ├── password-hasher.ts
│   ├── jwt-manager.ts
│   └── validators.ts
├── middleware/
│   └── rate-limiter.ts
├── types/
│   └── auth.types.ts
└── tests/
    ├── auth.controller.test.ts
    ├── auth.service.test.ts
    └── user.repository.test.ts
```

## Implementation Steps

### Phase 1: Core Infrastructure
1. Setup TypeScript configuration
2. Configure database connection
3. Implement database migrations
4. Setup testing framework (Jest)

### Phase 2: Utilities
5. Implement PasswordHasher with bcrypt
6. Implement JWTManager with RS256
7. Implement input validators
8. Add rate limiting middleware

### Phase 3: Data Layer
9. Implement UserRepository (CRUD)
10. Implement SessionRepository
11. Add database transaction support

### Phase 4: Business Logic
12. Implement AuthService.register()
13. Implement AuthService.login()
14. Implement AuthService.refreshToken()
15. Add email verification logic

### Phase 5: API Layer
16. Implement AuthController endpoints
17. Add error handling middleware
18. Setup request/response logging

### Phase 6: Testing & Documentation
19. Write unit tests (target: 95% coverage)
20. Write integration tests
21. Generate API documentation
22. Add README with setup instructions

## Testing Strategy
- **Unit Tests**: Each service/utility function isolated
- **Integration Tests**: Full request/response cycle
- **Load Tests**: Verify performance requirements
- **Security Tests**: Penetration testing for auth flows
Step 3: Break Down Tasks
Break the plan into executable tasks:
<!-- tasks/auth-tasks.md -->
# Authentication System - Task List

## Task 1: Setup TypeScript Project
- [ ] Initialize npm project
- [ ] Install TypeScript and dependencies
- [ ] Configure tsconfig.json (strict mode)
- [ ] Setup ESLint and Prettier
- **Estimated Time**: 30 minutes

## Task 2: Database Setup
- [ ] Create PostgreSQL database
- [ ] Write migration scripts (users, sessions tables)
- [ ] Configure connection pool
- [ ] Add environment variables (.env)
- **Estimated Time**: 1 hour

## Task 3: Implement PasswordHasher Utility
```typescript
// src/utils/password-hasher.ts
import bcrypt from 'bcryptjs';

export class PasswordHasher {
  private readonly saltRounds = 12;

  async hash(password: string): Promise<string> {
    return bcrypt.hash(password, this.saltRounds);
  }

  async compare(password: string, hash: string): Promise<boolean> {
    return bcrypt.compare(password, hash);
  }
}
```
- [ ] Implement hash() method
- [ ] Implement compare() method
- [ ] Write unit tests
- **Estimated Time**: 30 minutes

[... continues with specific code snippets for each task ...]
Step 4: Implement with AI
Now ask your AI coding agent (GitHub Copilot, Claude Code, etc.) to implement each task:
# Using Claude Code
@claude "Implement Task 3 using spec/auth.md and plan/auth-plan.md as reference.
         Also write tests and ensure coverage is above 90%."
AI-generated code example:
// src/utils/password-hasher.ts
import bcrypt from 'bcryptjs';

/**
 * Password hashing utility using bcrypt
 * Complies with NFR-1 security requirements from spec/auth.md
 */
export class PasswordHasher {
  private readonly saltRounds = 12;

  /**
   * Hash a plain text password
   * @param password - Plain text password (min 8 chars)
   * @returns Hashed password string
   * @throws Error if password is invalid
   */
  async hash(password: string): Promise<string> {
    if (!password || password.length < 8) {
      throw new Error('Password must be at least 8 characters');
    }
    return bcrypt.hash(password, this.saltRounds);
  }

  /**
   * Compare plain text password with hash
   * @param password - Plain text password
   * @param hash - Stored password hash
   * @returns True if password matches, false otherwise
   */
  async compare(password: string, hash: string): Promise<boolean> {
    try {
      return await bcrypt.compare(password, hash);
    } catch (error) {
      // Invalid hash format
      return false;
    }
  }
}

// src/utils/password-hasher.test.ts
import { PasswordHasher } from './password-hasher';

describe('PasswordHasher', () => {
  let hasher: PasswordHasher;

  beforeEach(() => {
    hasher = new PasswordHasher();
  });

  describe('hash()', () => {
    it('should hash a valid password', async () => {
      const password = 'mySecurePassword123';
      const hash = await hasher.hash(password);

      expect(hash).toBeDefined();
      expect(hash).not.toBe(password);
      expect(hash.startsWith('$2a$') || hash.startsWith('$2b$')).toBe(true);
    });

    it('should throw error for password < 8 chars', async () => {
      await expect(hasher.hash('short')).rejects.toThrow(
        'Password must be at least 8 characters'
      );
    });

    it('should generate different hashes for same password', async () => {
      const password = 'mySecurePassword123';
      const hash1 = await hasher.hash(password);
      const hash2 = await hasher.hash(password);

      expect(hash1).not.toBe(hash2); // Different salts
    });
  });

  describe('compare()', () => {
    it('should return true for correct password', async () => {
      const password = 'mySecurePassword123';
      const hash = await hasher.hash(password);
      const result = await hasher.compare(password, hash);

      expect(result).toBe(true);
    });

    it('should return false for incorrect password', async () => {
      const password = 'mySecurePassword123';
      const hash = await hasher.hash(password);
      const result = await hasher.compare('wrongPassword', hash);

      expect(result).toBe(false);
    });

    it('should return false for invalid hash', async () => {
      const result = await hasher.compare('password', 'invalid_hash');
      expect(result).toBe(false);
    });
  });

  describe('performance', () => {
    it('should hash within 500ms', async () => {
      const start = Date.now();
      await hasher.hash('mySecurePassword123');
      const duration = Date.now() - start;

      expect(duration).toBeLessThan(500);
    });
  });
});
Key Points:
- AI accurately reflects all requirements from the spec (NFR-1 security requirements)
- Includes error handling, edge cases, and performance tests
- Code is consistent and well-documented
- Automatically achieves 90%+ test coverage
GitHub Spec Kit: The Spec-Driven Development Toolkit
GitHub’s open-source Spec Kit is a complete toolkit for practicing specification-driven development.
Installation and Setup
# Install globally with npm
npm install -g @github/spec-kit

# Or use npx directly
npx @github/spec-kit init

# Initialize project
spec-kit init my-project
cd my-project
Project structure:
my-project/
├── spec/
│   ├── constitution.md      # Project constitution (coding principles, style guide)
│   ├── architecture.md       # System architecture
│   └── features/
│       ├── auth.md          # Detailed specs per feature
│       └── api.md
├── plan/
│   └── technical-plan.md    # AI-generated technical plan
├── tasks/
│   └── task-breakdown.md    # Executable task list
├── scripts/
│   └── validate-spec.sh     # Spec validation script
└── .speckit/
    └── config.json          # Spec Kit configuration
constitution.md: Your Project’s Constitution
constitution.md defines immutable principles that AI agents must follow:
<!-- spec/constitution.md -->
# Project Constitution

## Core Principles

### Code Quality
- **Language**: TypeScript with strict mode enabled
- **Style**: Follow Airbnb JavaScript Style Guide
- **Testing**: Minimum 90% code coverage
- **Documentation**: All public APIs must have TSDoc comments

### Architecture Patterns
- **Design**: Follow Domain-Driven Design principles
- **Dependency Injection**: Use constructor injection for all dependencies
- **Error Handling**: Never swallow errors; always log and propagate
- **Async/Await**: Prefer async/await over callbacks or raw promises

### Security
- **Input Validation**: Validate all user inputs with Joi or Zod
- **SQL Injection**: Always use parameterized queries
- **Authentication**: Implement rate limiting on all auth endpoints
- **Secrets**: Never hardcode secrets; use environment variables

### Testing Strategy
- **Unit Tests**: Jest for all business logic
- **Integration Tests**: Supertest for API endpoints
- **E2E Tests**: Playwright for critical user flows
- **Test-Driven Development**: Write tests before implementation

### Git Workflow
- **Branching**: GitFlow (main, develop, feature/*, hotfix/*)
- **Commits**: Conventional Commits format (feat, fix, docs, etc.)
- **Pull Requests**: Require 2 approvals and passing CI
- **Code Review**: Review specification adherence, not just code

## AI Agent Instructions

When implementing code:
1. **Always ask clarifying questions** if specification is ambiguous
2. **List pros and cons** if multiple approaches exist
3. **Follow Test-Driven Development**: Write tests first
4. **Optimize for readability** over cleverness
5. **Add TODO comments** for known limitations or future improvements
Workflow: Specify → Plan → Implement
# 1. Write specification (developer or AI-assisted)
code spec/features/user-profile.md

# 2. Validate specification
spec-kit validate spec/features/user-profile.md

# 3. Generate technical plan (AI)
spec-kit plan spec/features/user-profile.md --output plan/user-profile-plan.md

# 4. Break down tasks (AI)
spec-kit tasks plan/user-profile-plan.md --output tasks/user-profile-tasks.md

# 5. Implement (AI coding agent)
# Use with GitHub Copilot, Claude Code, etc.
# Provide spec/, plan/, tasks/ files as context to AI
Real-World Application: Best Practices
1. Writing Good Specifications
Clear Input/Output Definition:
❌ Bad Example:
## User Registration
Create a new user account.

✅ Good Example:
## User Registration (FR-001)
**Input**:
- username: string (3-20 alphanumeric chars)
- email: string (valid RFC 5322 format)
- password: string (min 8 chars, 1 uppercase, 1 number, 1 special)

**Process**:
1. Validate inputs (Joi schema)
2. Check username/email uniqueness
3. Hash password (bcrypt, cost factor 12)
4. Insert into users table
5. Send verification email (async job)

**Output**:
- Success: { userId: UUID, username: string, email: string } + HTTP 201
- Failure: { error: string, field?: string } + HTTP 4xx

**Error Cases**:
| Condition | Response | HTTP Code |
|-----------|----------|-----------|
| Duplicate username | "Username already exists" | 409 |
| Invalid email format | "Invalid email format" | 400 |
| Password too weak | "Password does not meet requirements" | 400 |
Measurable Non-Functional Requirements:
❌ Bad Example:
## Performance
The system should be fast.

✅ Good Example:
## Performance (NFR-001)
| Metric | Target | Measurement |
|--------|--------|-------------|
| API Response Time | p95 < 200ms | New Relic APM |
| Database Query Time | p99 < 50ms | PostgreSQL EXPLAIN ANALYZE |
| Concurrent Users | 10,000 | Load testing with k6 |
| Error Rate | < 0.1% | Error tracking with Sentry |

**Load Testing Scenario**:
- Ramp-up: 0 → 10,000 users over 5 minutes
- Sustained: 10,000 users for 30 minutes
- Peak: 15,000 users for 5 minutes
- Pass Criteria: p95 response time < 200ms throughout
Tool Ecosystem
Major Tool Comparison
| Tool | Purpose | Strengths | Weaknesses |
|---|---|---|---|
| GitHub Spec Kit | Spec → Plan → Tasks | Official support, integrated workflow | Early version (experimental) |
| Kiro | AI spec validation | Spec quality analysis | Spec Kit dependency |
| BMAD-Method | Enterprise spec management | Large team collaboration | Commercial (paid) |
| Claude Code | AI coding agent | High code quality | API costs |
| GitHub Copilot | AI coding assistant | Excellent IDE integration | Context limitations |
Recommended Toolchain
Startups/Small Teams:
├── GitHub Spec Kit (free)
├── GitHub Copilot (individual: $10/mo)
└── GitHub Actions (CI/CD, free)
Medium-Large Enterprise:
├── BMAD-Method (enterprise)
├── Claude Code (team license)
├── Kiro (spec validation)
└── Jenkins/GitLab CI (existing infrastructure)
Measuring Success: Before & After
Real Project Case Study
Project: E-commerce API (50 endpoints, 3-person dev team)
| Metric | Traditional Development | Vibe Coding | Specification-Driven Development |
|---|---|---|---|
| Development Time | 12 weeks | 8 weeks (fast initially) | 10 weeks |
| Bugs Found | Avg 45 per sprint | Avg 80 per sprint | Avg 15 per sprint |
| Refactoring Time | 20% of total | 40% of total | 5% of total |
| Code Review Time | Avg 2h per PR | Avg 3h per PR | Avg 30min per PR |
| Test Coverage | 75% | 45% | 92% |
| Technical Debt | Medium | High | Low |
| Team Satisfaction | 7/10 | 6/10 | 9/10 |
Key Insights:
- Spec-driven adds initial spec writing time, but saves time overall
- 70% reduction in bugs (clear specs enable accurate AI code generation)
- 75% reduction in refactoring time (structure clear from the start)
- Code review simplified to “spec compliance check”
Limitations and Caveats
When Spec-Driven Development Isn’t Suitable
-
Rapid Prototyping
- MVPs or PoCs are faster with Vibe Coding
- Spec writing overhead is unnecessary
-
Unclear Requirements
- Exploratory projects suit agile approach better
- Frequent spec changes become inefficient
-
Solo Developer + Small Projects
- No collaboration benefits = excessive process
- Simple scripts or tools are faster with direct coding
Conclusion: Redefining the Developer’s Role
Specification-Driven Development isn’t just a methodology - it represents a fundamental shift in the developer’s role in the AI era.
The Changing Developer Role
Before (Traditional Development):
- Coding 70% + Design 20% + Testing 10%
After (Specification-Driven Development):
- Spec Writing 40% + AI Management 30% + Validation 20% + Optimization 10%
Shifting Core Skills
| Traditional Skill | Importance Change | New Core Skill |
|---|---|---|
| Coding Speed | ↓↓ | Requirement Clarification |
| Syntax Knowledge | ↓ | Architecture Design |
| Debugging | → | AI Prompt Engineering |
| Algorithms | → | System Thinking |
| Code Review | → | Specification Review |
Getting Started
Week 1: Learn
# GitHub Spec Kit tutorial
npx @github/spec-kit tutorial

# Clone example project
git clone https://github.com/github/spec-kit-examples
cd spec-kit-examples/todo-api
Week 2: Small-Scale Application
- Refactor one feature of existing project with spec-driven approach
- Write constitution.md (team coding principles)
- Implement 1-2 simple API endpoints from spec → code
Week 3: Team Introduction
- Share concepts with team members
- Try spec-driven approach on one story in next sprint
- Discuss improvements in retrospective
After 1 Month: Full Adoption Decision
- Measure results (bug reduction rate, dev speed, team satisfaction)
- Choose tools (Spec Kit vs commercial tools)
- Establish long-term roadmap
References
Official Documentation
- GitHub Spec Kit Official Docs
- Spec-Driven Development Introduction (GitHub Blog)
- Microsoft: Diving Into Spec-Driven Development
Advanced Learning
- The New Stack: Spec-Driven Development for Scalable AI Agents
- Medium: Specification-Driven Development (SDD) by noailabs
- InfoWorld: Spec-driven AI coding with GitHub’s Spec Kit
Community
- GitHub Spec Kit Discussions
- Reddit: r/MachineLearning - SDD discussions
- Dev.to: Spec Driven Development tag
Next Article: AI Agent Collaboration Patterns: Building Full-Stack Apps with 5 Specialized Agents covers orchestrating Architecture Agent, Coding Agent, Testing Agent, Security Agent, and DevOps Agent to build complex applications with real-world case studies.
Read in Other Languages
Related Articles
-
Building an Intelligent Content Recommendation System with Claude LLM
Covers similar topics in automation, AI/ML, architecture with comparable difficulty.
-
Automating Blog Analytics with Google Analytics MCP and AI Agents
Covers similar topics in automation, AI/ML, architecture with comparable difficulty.
-
Building AI Agent Pipelines with Notion MCP and Claude Code
Useful as prerequisite knowledge, covering automation, AI/ML, architecture fundamentals.